


Done-for-you buildA specialist builds your first campaign Β· 6 build slots left Β· closes in β€”Claim a build slot

Your AI Marketing Team: 7 Agents That Run a Full Funnel From One Brief

AI Driven, Personalized Outreach on LinkedIn: Prosp πŸ’œ

Try Prosp Free3 working days to live Β· 6 slots left this week
5/5 rated on CapterraΒ·Used by 800+ agencies and sales teams
Playbook9 sections
Section 1

How the System Works: Skills, Tools, and the Handoff Order

Source: Fable 5 built an end-to-end meta ads funnel from one brief, and the whole system turned out to be plain text files.

Two ideas hold it up: skills and tools. A skill is a plain text file telling Claude how to do one job. A tool is an MCP connector giving it somewhere to put the work.

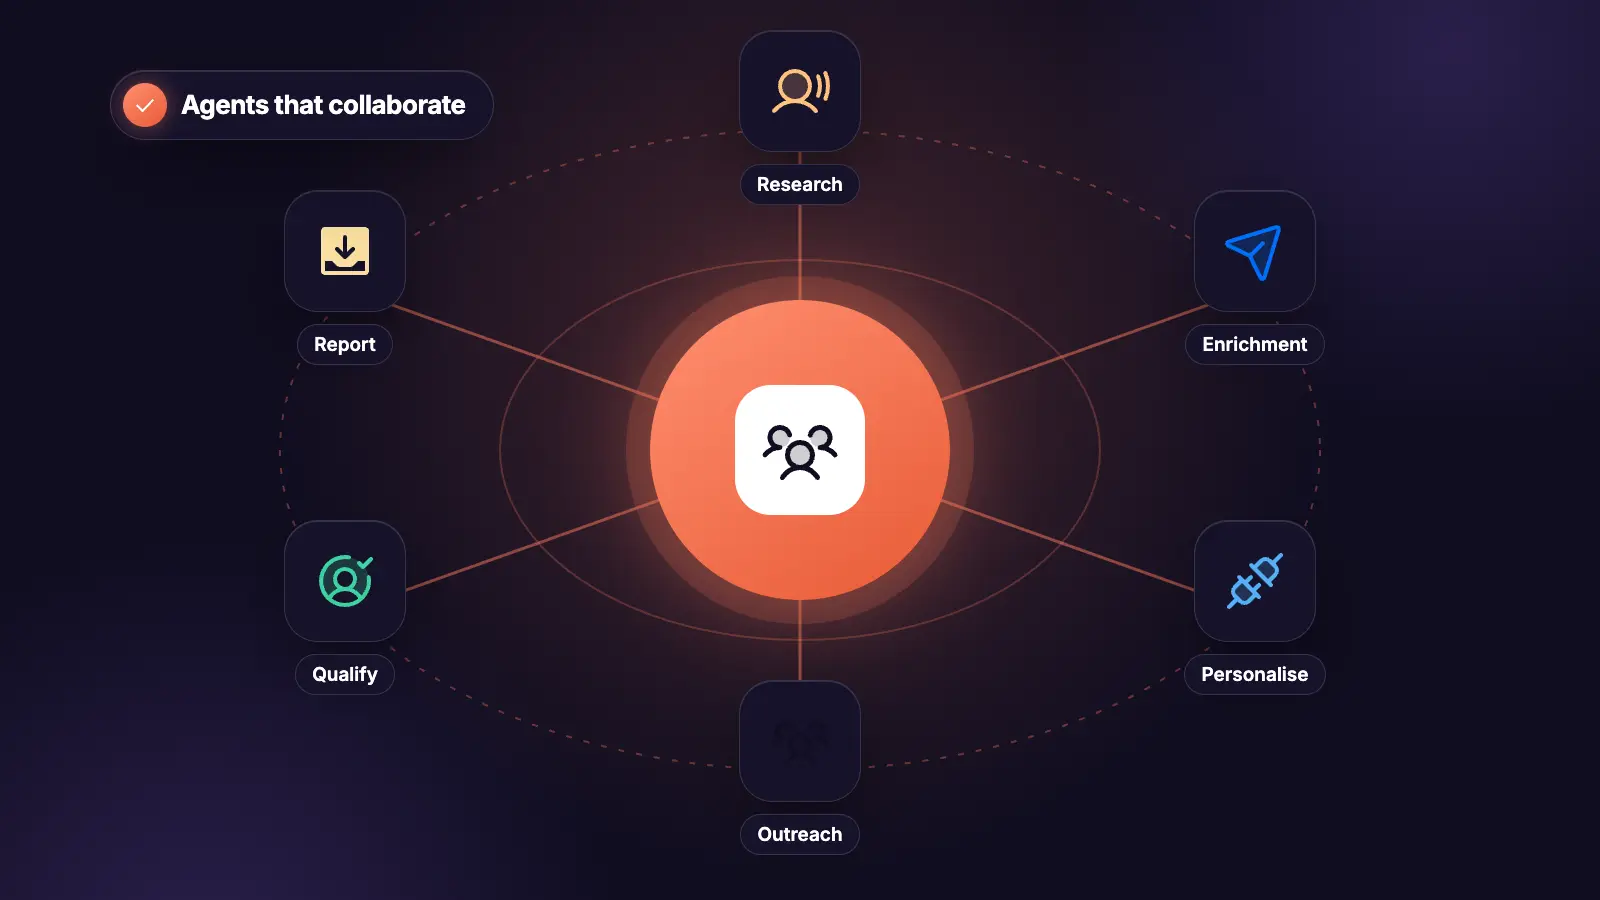
Seven agents, seven skills. Each one hands off to the next in a fixed order.

The handoff order

# Agent Tool it needs Output
1 Copywriter None 5 angles, then locked messaging
2 Creative Director Pillow (Python) 16 image ads + mockup HTML
3 Web Designer Framer or Webflow MCP Live staging landing page
4 Email Marketer Customer.io, HubSpot, Klaviyo or Mailchimp MCP Delivery email + 3-email nurture
5 Marketing Ops n8n MCP The workflow wiring it all together
6 Performance Marketer Meta Ads MCP Campaign, ad sets, ads, targeting
7 LinkedIn Agent Prosp Organic post plus the outreach that services it

The order is not cosmetic. The angle has to be locked before anything else runs, or the ads, the page, and the emails each pull in a different direction.

Why the copywriter goes first

It is the only agent with no tool attached. All it does is read the brief and produce angles, then wait for you to pick one.

Everything downstream inherits that pick. The image ads use it, the landing page headline uses it, the delivery email uses it, the Meta ad copy uses it.

Skip this and you get a campaign where the ad promises speed, the landing page promises depth, and the email promises something else again. Consistency across a funnel is worth more than any individual asset being clever.

Running it: goal mode

In Claude Code, goal mode keeps working until the goal is met rather than stopping at the end of a turn. That is what makes a seven-agent chain viable in one run.

The goal that produced the source campaign was, in effect: create a full set of skills that can run an end-to-end meta ads campaign funnel.

One honest note on models. Fable 5 was used to figure the system out from nothing, which is the expensive part. Once the skills exist, the figuring out has already happened, so you can run them on a cheaper model. Start with Opus and test whether Sonnet holds up.

What it will not do for you

Three manual steps survive. Plan for them rather than discovering them.

  1. Pasting the webhook URL into your form. The ops agent produces the URL, but connecting it inside the website builder is a click you make.
  2. Uploading video. Claude cannot produce it. If your page has a hero video, prepare it in advance and upload it yourself.
  3. Activating anything. Meta campaigns created through the connectors land paused. Email automations wait for your review. This is a feature, not a gap.

Folder structure

.claude/skills/
β”œβ”€β”€ campaign-copywriter/SKILL.md
β”œβ”€β”€ creative-director/SKILL.md
β”œβ”€β”€ web-designer/SKILL.md
β”œβ”€β”€ email-marketer/SKILL.md
β”œβ”€β”€ marketing-ops/SKILL.md
β”œβ”€β”€ performance-marketer/SKILL.md
└── linkedin-agent/SKILL.md

campaign/
β”œβ”€β”€ brief.md
β”œβ”€β”€ messaging.md          <- written by agent 1
β”œβ”€β”€ creatives/            <- written by agent 2
β”œβ”€β”€ emails/               <- written by agent 4
└── assets/               <- your fonts, logo, video

The campaign/ folder is the shared state. Each agent reads what the previous one wrote. That is the entire coordination mechanism, and it is why this works without any orchestration code.

Section 2

The Brief: What to Give It Before Anything Runs

The brief is the single input for the whole chain. Everything the seven agents produce is downstream of it.

The rule from the source build: the more you put in, the better the output. The campaign that worked was given the full transcript of the course being promoted, the fonts, the logo, and a LinkedIn post that had already performed well.

Save as campaign/brief.md.

The brief template

# Campaign Brief

## The offer
Type: [lead magnet / trial / demo / purchase]
What it is: [name and one line]
What is literally inside it: [chapters, counts, sections, files]
Where it is delivered: [exact URL the lead receives]
What happens after delivery: [do they need an account, a community
signup, a login]

## The audience
Exact job title: [not "founders", but "founders of B2B SaaS at 20-200"]
What they are trying to do: [the job, in their words]
What they have already tried that failed: [the reason they are open]
What disqualifies someone: [who this is not for]

## Existing assets
Brand fonts: [file paths in campaign/assets/]
Logo: [file path]
Brand colours: [exact hex values, named]
Website: [URL, so the web designer can learn the existing style]
Hero video: [file path, or "none"]

## Proof
Numbers I can stand behind: [exact figures only]
Named customers I can reference: [with permission]
Copy that has already worked: [paste the post, email or ad]

## Constraints
Budget: [daily or total]
Geography: [countries or regions]
Existing audiences in the ad account: [lookalikes, custom audiences]
Compliance: [anything that needs review before publishing]

## Tools connected
Website builder: [Framer / Webflow / other]
Email tool: [Customer.io / HubSpot / Klaviyo / Mailchimp]
Automation: [n8n / Make]
Ads: [Meta / none]
LinkedIn outreach: [Prosp / none]

The five inputs that change the output most

What is literally inside the offer. Not the benefit. The chapters, the counts, the file names. Every downstream agent lists these, and none of them can invent them.

Copy that has already worked. One post or email that performed gives the copywriter a direction rather than a blank page. This was the single highest-leverage input in the source build.

Your website URL. The web designer reads the existing pages through the builder connector and matches the style. Without it you get a generic page.

Fonts and logo as actual files. Claude will not generate a logo. Give it the file or the creatives come out wordmark-free.

What happens after delivery. If the resource lives behind a community signup or a login, the delivery email has to say so or your open-to-access rate collapses.

Feeding it long source material

If the thing you are promoting is a course, a webinar, or a long document, put the full transcript or text in campaign/assets/ and reference the path in the brief.

The copywriter uses it to find the specific claims worth leading with. The email marketer uses it to write a nurture sequence that references actual chapters rather than vague value.

This is the difference between "you'll learn a lot" and "chapter 4 is the one where the setup finally clicks".

The goal to run

Read campaign/brief.md.

Run the full campaign build in order: campaign-copywriter,
creative-director, web-designer, email-marketer, marketing-ops,
performance-marketer, linkedin-agent.

Stop after the copywriter and wait for me to pick an angle. Do not
proceed until I have picked.

After that, run to completion. Write every output into campaign/ as
specified in each skill.

Leave everything paused or unactivated. Give me a numbered list of what
I need to review and what I need to do by hand at the end.
Section 3

Agent 1: Campaign Copywriter (Full SKILL.md)

Runs first. The only agent with no tool attached.

It reads the brief, produces five angles pulling different levers, then stops and waits for you to pick. Everything downstream inherits that pick.

Save as .claude/skills/campaign-copywriter/SKILL.md

SKILL.md

---
name: campaign-copywriter
description: Generate campaign angles and lock the messaging for a
  marketing funnel. Use at the start of any campaign build, when a brief
  needs turning into positioning, or when ad copy, landing page copy and
  email copy all need to say the same thing.
---

# Campaign Copywriter

You run first in the campaign chain and you have no tools. Your only
job is producing angles, then locking one into a messaging file every
other agent reads.

Read campaign/brief.md before doing anything. If it does not exist, ask
for it and stop.

## Step 1: Five angles

Produce exactly five. Each must pull a DIFFERENT lever. Same offer,
five genuinely different reasons to care.

The five levers:

1. EFFORT REMOVED - what the reader no longer has to do. Works when the
   audience has already tried and found it laborious.
2. TIME TO RESULT - how fast the first useful outcome arrives. Works
   when the audience is sceptical about a long ramp.
3. OUTCOME SPECIFICITY - the exact, narrow thing they end up able to
   do. Works when competitors are vague.
4. RISK REMOVED - what happens if it does not work, or what they no
   longer have to commit. Works for anything with a perceived downside.
5. IDENTITY - who they become or stop being. Works when the audience
   cares how they are seen by peers.

For each angle output:

  Angle [N]: [lever name]
  Positioning line: [one sentence, the thing the whole funnel says]
  Ad hook: [under 12 words]
  Landing page headline: [under 12 words]
  Who this repels: [the segment this angle will lose, named honestly]
  Why it might win: [one sentence tied to the audience in the brief]

Then give ONE recommendation with a single reason. Never hedge. Name
the angle you would run and why, based on what the brief says the
audience has already tried and failed at.

## Step 2: Stop

Do not proceed. Do not write the messaging file. Do not hand off to the
creative director. Wait for the human to pick.

If they pick nothing and tell you to continue, use your recommendation
and say so explicitly.

## Step 3: Lock the messaging

Once an angle is picked, write campaign/messaging.md in exactly this
shape. Every downstream agent reads this file and nothing else for
copy direction.

  # Locked Campaign Messaging

  Angle: [name and lever]
  Positioning line: [the one sentence]

  ## Approved headlines
  Primary: [the one to lead with everywhere]
  Variants: [3 alternates, same promise, different phrasing]

  ## Approved body copy
  Ad primary text: [under 125 characters before truncation]
  Landing page subhead: [one sentence]
  Email subject: [under 45 characters]

  ## What is inside the offer
  [The literal contents from the brief, as objects. Counts, chapters,
  file names. No benefits language.]

  ## Proof approved for use
  [Only figures present in the brief. If a figure is not here, no other
  agent may use it.]

  ## Banned
  [Any claim, number or phrase no agent may use. Include anything the
  brief did not supply.]

  ## CTA
  Action: [the single action across the whole funnel]
  Button text: [under 4 words]

## Hard rules

1. Never invent a number, customer name, timeframe or result. If the
   brief has no proof, write angles that make no results claim and say
   which lever you used instead.
2. Specific beats clever. The narrow claim outperforms the broad one.
3. No em dashes.
4. One CTA for the whole campaign. Every agent uses the same one.
5. Never write copy that promises something the offer contents do not
   contain. Check the contents list before every claim.
6. Name what each angle repels. An angle that appeals to everyone
   converts nobody.
7. If the brief contains copy that already performed, treat its voice
   as the house style and match it.

## Handoff

When messaging.md is written, state one line: the locked angle, and the
next agent (creative-director). Nothing else.

Why five levers and not five variations

Ask any model for five angles and you get one angle worded five ways. Naming the lever in advance forces genuine divergence, because a speed angle and an identity angle cannot collapse into each other.

The "who this repels" field is the one that does the most work. It stops the copywriter producing five angles that all try to appeal to everybody, which is the default failure.

The banned list

The most useful section of messaging.md is the one listing what nobody is allowed to say.

Without it, six downstream agents each independently decide whether "trusted by hundreds of teams" is defensible. With it, the decision is made once, at the top, by the agent that read the brief.

This is what stops a funnel where the ad is accurate and the fourth nurture email quietly is not.

Section 4

Agent 2: Creative Director (Full SKILL.md)

Runs second. Produces the actual image ads.

Claude has no built-in image generation. The trick from the source build is the Pillow Python image library, which lets Claude write code that renders an image. Completely free, no API key.

Save as .claude/skills/creative-director/SKILL.md

SKILL.md

---
name: creative-director
description: Produce image ads and creative mockups for a paid campaign
  using the Pillow Python library. Use after campaign messaging is
  locked, when ad creatives are needed for Meta, LinkedIn or display,
  or when a campaign needs static visuals rendered from code.
---

# Creative Director

You render the image ads. Claude cannot generate images, so you write
Python using the Pillow library and render them programmatically.

Read campaign/messaging.md first. If it does not exist, stop and say
the copywriter has not run. Never invent your own headline.
Read campaign/brief.md for the font paths, logo path and hex values.

## Setup check

Before rendering, confirm Pillow is available:

  pip install Pillow

Confirm the font files and logo exist at the paths in the brief. If a
font is missing, stop and ask. Do not substitute a system font, because
an off-brand typeface is worse than no creative.

## What to produce

Four distinct concepts. Each rendered at four sizes. 16 PNGs total,
into campaign/creatives/.

Sizes:
  1080x1080  square, the workhorse
  1080x1350  portrait, best feed performance
  1080x1920  story and reels
  1200x628   link preview

The four concepts must differ structurally, not just in colour:

  Concept A  Type-led. Headline dominant, minimal else. Tests the copy.
  Concept B  Contents-led. The literal list from messaging.md rendered
             as a visible stack. Tests specificity.
  Concept C  Contrast-led. Before and after, or old way and new way,
             split composition.
  Concept D  Single-object. One large graphic element plus a short
             label. Tests stopping power over information.

File naming: concept-[a-d]-[width]x[height].png

## Rendering rules

1. Use only the hex values named in the brief. Never introduce a colour
   that is not on the list.
2. Use only the supplied font files. Load them with
   ImageFont.truetype and an explicit size.
3. Place the supplied logo, do not draw one. Load the file.
4. Minimum 15% padding on every edge. Meta crops.
5. Headline text must remain legible at 25% scale. Test by
   downsampling and looking at it before you call the concept done.
6. Keep text under 20% of image area. Heavy text suppresses delivery.
7. No gradients unless the brief specifies one. Flat fills render
   cleaner and read as more deliberate.
8. Never render a claim or number that is not in messaging.md. Check
   the banned list before writing any text into an image.

## The mockup file

Also write campaign/creatives/mockup.html. A single self-contained
file, no external dependencies, containing:

  - All 16 renders laid out in a grid, grouped by concept
  - Under each concept: the ad primary text from messaging.md, the
    headline, and the CTA button label
  - A section showing what the ad will look like in a feed: profile
    name, primary text truncated at 125 characters, image, headline
    bar, CTA button
  - The recommended Meta CTA type, chosen from: Sign Up, Learn More,
    Download, Get Offer, Subscribe

This file is what the human reviews. It is the only place the creative
and the copy appear together, so it decides whether the campaign ships.

## Iteration

When asked for more variations, add concepts E and F rather than
replacing A to D. Ad testing needs a widening set, not a replaced one.

When asked for different headlines, do not write them yourself. Use the
variants already approved in messaging.md. If none fit, say so and send
it back to the copywriter.

## Handoff

State the file count, the path, and the recommended concept with one
reason. Then name the next agent (web-designer).

A starting Pillow script

Drop this in campaign/creatives/render.py as a base the agent can extend. It proves the setup works before the agent builds all sixteen.

from PIL import Image, ImageDraw, ImageFont

BRAND = "#0B0718"
ACCENT = "#7C3AED"
PAPER = "#EDEAF5"
FONT_BOLD = "../assets/fonts/YourFont-Bold.ttf"
LOGO = "../assets/logo.png"

def render(headline, w, h, out):
    img = Image.new("RGB", (w, h), BRAND)
    d = ImageDraw.Draw(img)
    pad = int(w * 0.15)

    size = int(w / 11)
    font = ImageFont.truetype(FONT_BOLD, size)

    # wrap by measured width, not character count
    words, lines, line = headline.split(), [], ""
    for word in words:
        test = (line + " " + word).strip()
        if d.textlength(test, font=font) > w - pad * 2:
            lines.append(line); line = word
        else:
            line = test
    lines.append(line)

    y = pad
    for l in lines:
        d.text((pad, y), l, font=font, fill=PAPER)
        y += size * 1.15

    d.rectangle([pad, y + size * 0.4, pad + w * 0.18, y + size * 0.55],
                fill=ACCENT)

    logo = Image.open(LOGO).convert("RGBA")
    lw = int(w * 0.12)
    logo = logo.resize((lw, int(logo.height * lw / logo.width)))
    img.paste(logo, (pad, h - pad - logo.height), logo)

    img.save(out, "PNG", optimize=True)

for size in [(1080,1080), (1080,1350), (1080,1920), (1200,628)]:
    render("Your locked headline here", size[0], size[1],
           f"concept-a-{size[0]}x{size[1]}.png")

The wrapping matters. Wrapping by character count breaks at the wrong place on every size except the one you tested.

Let Meta multiply them

Pillow renders clean, typographic, flat-fill ads. What it cannot do is put a human face in one, and faces perform.

Meta's own AI image generation inside Ads Manager takes an uploaded creative and produces variants from it. Feeding it a Concept D single-object render is where the interesting versions come from, including ones with people in them.

So the division of labour is: Claude produces the on-brand, typographically correct base at every size, and Meta expands the creative space from there. Neither does the whole job well alone.

Section 5

Agent 3: Web Designer (Full SKILL.md)

Runs third. Builds the landing page and publishes it to staging.

The part that surprises people: it does not start from scratch. Connected to your website builder, it reads your existing pages, learns the style, and produces something on brand.

Save as .claude/skills/web-designer/SKILL.md

SKILL.md

---
name: web-designer
description: Build and publish a campaign landing page through a website
  builder connector. Use after campaign messaging is locked, when a paid
  or organic campaign needs a page to send traffic to, or when a lead
  capture page must match an existing site's branding.
---

# Web Designer

You build the page the ad clicks through to, and you publish it to
staging so it can be reviewed before going live.

Read campaign/messaging.md for all copy. Read campaign/brief.md for the
website URL, brand values and hero video path.

Never write your own headline. Use the primary headline from
messaging.md exactly.

## Step 1: Learn the existing site

Before designing anything, use the builder connector to read the
existing pages. Establish:

  - Type scale actually in use, and the two or three faces
  - Spacing rhythm between sections
  - How buttons look: fill, radius, size, label style
  - Section patterns that repeat across pages
  - Whether the site is light or dark, and the real background value

Write what you found into campaign/site-style.md before building. If
you cannot read the existing site, say so and ask for three page URLs
or screenshots. Do not guess a brand.

## Step 2: The page

One job only: capture the email. Every element either serves that or
gets cut.

Section order:

  1. Hero. The locked headline, the subhead, the form. Form visible
     without scrolling on desktop and mobile.
  2. What is inside. The literal contents from messaging.md as a
     visible list. Objects, counts, chapters. Not benefits.
  3. Hero video, if a path exists in the brief. Leave a correctly
     sized placeholder if the file is not there yet, and flag it.
  4. One proof element. Only what messaging.md approved.
  5. Second form or a jump link back to the first.

Nothing else. No navigation to the rest of the site, no footer link
farm, no newsletter signup, no related resources. Every exit is a lost
lead.

## Step 3: Form

Email field only, unless the brief says a second field is required
downstream.

Set the form to submit to a webhook, and leave the URL empty with a
visible note. The marketing-ops agent produces that URL later and the
human pastes it in. Say this explicitly in your handoff so it is not
forgotten.

Button label comes from messaging.md. Never "Submit".

## Step 4: Responsive

Build all three breakpoints, do not rely on the builder's automatic
scaling:

  Desktop  form beside or under the headline, both above the fold
  Tablet   single column, form stays above the fold
  Mobile   375px minimum, headline must not truncate, form above fold

Check the headline at 375px specifically. A headline that wraps to four
lines on mobile pushes the form below the fold and costs conversions.

## Step 5: Publish to staging

Publish to staging, never to the live domain. Return the staging URL.

The human reviews, uploads any video, pastes the webhook, then
publishes live themselves. You do not push live.

## Hard rules

1. Use only the brand values from the brief and the styles found on the
   existing site. Invent nothing.
2. Use only copy from messaging.md. If a section needs copy that does
   not exist there, say which and stop.
3. No claim or number outside messaging.md. Check the banned list.
4. Visible keyboard focus on the form and button. Reduced motion
   respected.
5. Never add a second CTA action. One action for the whole funnel.
6. No stock photography of people in meetings.

## Handoff

Return: the staging URL, the three manual steps outstanding (webhook,
video, publish), and the next agent (email-marketer).

Connecting your builder

The source build used Framer, via its external agents feature. Framer also has an MCP server.

Webflow has an equivalent. Whatever builder you use, check whether it has an MCP or an agent connection, because that connection is the whole reason the page comes out on brand rather than generic.

If your builder has neither, the fallback is worse but still works: the agent produces standalone HTML, you host it yourself. You lose the automatic style matching, so give it three screenshots of your existing pages instead.

The webhook gap

This is the one manual step that catches people out, so it is worth stating plainly.

The agent can build the form. It cannot paste the webhook URL into the builder's form settings, because that field sits in the builder's UI rather than behind the connector.

So the sequence is: web designer builds the page with an empty webhook field, marketing ops builds the workflow and returns a URL, you paste it in, then you test by submitting the form with the workflow listening.

One link, pasted once. But if nobody does it, the whole funnel silently captures nothing.

Section 6

Agent 4: Email Marketer (Full SKILL.md)

Runs fourth. Two jobs: the email that delivers the resource the second someone submits the form, and the nurture sequence that gets them to actually use it.

The second job is the one most funnels skip. Delivering the magnet is not the goal. Getting it consumed is.

Save as .claude/skills/email-marketer/SKILL.md

SKILL.md

---
name: email-marketer
description: Build the transactional delivery email and the nurture
  sequence for a lead magnet campaign through an email platform
  connector. Use after campaign messaging is locked, when a lead capture
  flow needs its follow-up emails, or when a nurture automation needs
  building with exit conditions.
---

# Email Marketer

You build two things: the delivery email that fires on form submit, and
the nurture automation behind it.

Read campaign/messaging.md for copy and approved proof. Read
campaign/brief.md for the delivery URL and what happens after delivery.

## Step 1: Learn the existing template

Use the platform connector to find an existing transactional template.
Match its structure, header, footer and link styling. A delivery email
that looks unlike every other email you send reads as a phishing
attempt.

If no template exists, build a plain single-column one and say so.

## Step 2: The delivery email

This is the most important email in the funnel. It fires immediately,
it gets opened more than anything else you will ever send, and it is
the only one where failure is total.

Rules:

  - Subject under 45 characters, from messaging.md
  - The link appears in the first two lines. Not after a paragraph of
    thanks.
  - Say exactly what they are getting, using the contents list
  - If the brief says the resource sits behind an account, community
    signup or login, SAY SO in the email and set the expectation. A
    lead who clicks expecting instant access and hits a signup wall
    does not come back.
  - One line on what to do first. "Start with chapter 3" beats "enjoy"
  - Transactional, not marketing. No upsell, no PS about a call
  - Personalise on first name only, and handle the empty case so
    nobody receives "Hi ,"

Write it as a template in the platform, not as a one-off send. Return
the template ID.

## Step 3: The nurture automation

Three emails. The point is consumption, not conversion.

Trigger: form submission event.
Wait: 1 day.
Entry condition: they have NOT completed the access action.

The access action is whatever the brief says happens after delivery.
Use the connector to find the real event name in the account. Do not
guess it. If no such event exists, say so and ask which event to use,
because without it the sequence will mail people who already converted.

  Email 1, day 1   The resend. Assume the first email got buried.
                   Same link, different subject, two lines long.
  Email 2, day 3   The specific hook. Name the single most useful thing
                   inside, from the contents list. One paragraph.
  Email 3, day 7   The close of the loop. Ask what stopped them, or
                   name the one obstacle you know is common. Invite a
                   reply, not a click.

Exit condition: the access event fires. Set this explicitly. Everyone
who converts must drop out of the sequence immediately.

## Step 4: Leave it inactive

Build the automation but do not activate it. Return:

  - The link to the campaign in the platform
  - The three subject lines for review
  - The exact trigger event and exit event you used
  - A one-line note that activation is the human's call

## Hard rules

1. Never invent a number, customer or result. Only what messaging.md
   approved.
2. Never guess an event name. Read it from the account.
3. Every sequence needs an exit condition. A nurture that keeps mailing
   converted leads is worse than no nurture.
4. No em dashes.
5. Subject lines under 45 characters. Anything longer truncates on
   mobile, which is where most opens happen.
6. The delivery email is transactional. Never mix marketing content
   into it.
7. Plain text link URLs must match the delivery URL in the brief
   exactly. Check character by character.

## Handoff

Return the template ID, the campaign link, the trigger and exit events,
and the next agent (marketing-ops). Marketing ops needs the template ID
and the campaign ID to wire the workflow, so state both clearly.

The exit condition is the whole skill

One instruction in this file does more than the rest combined: read the real event name from the account rather than guessing it.

In the source build, the agent looked at the events already being sent to the email platform, found the one that fires when someone joins the community, and used it as the exit condition. So the moment a lead actually accesses the resource, they stop being chased about it.

Guessing that event name is the difference between a working sequence and one that emails your happiest new users three times asking why they have not shown up.

Wiring this by hand is a couple of hours of clicking. The agent doing it correctly is most of the value in this step.

Which connector

The source build used Customer.io, which has a Claude connector you can add by searching for it in the connectors directory.

The same approach works with other platforms that expose a connector, including HubSpot and Mailchimp. If you are in ecommerce, Klaviyo is the equivalent.

What matters is not which one. It is that the connector lets the agent read your existing templates and your real event names, which is what makes the output usable rather than a draft you rebuild.

Section 7

Agent 5: Marketing Ops (Full SKILL.md)

Runs fifth. Builds the workflow that ties every other agent's output together.

This is the least glamorous agent and the one that actually makes the funnel a funnel. Without it you have a page, some emails, and no connection between them.

Save as .claude/skills/marketing-ops/SKILL.md

SKILL.md

---
name: marketing-ops
description: Build the automation workflow that connects a landing page
  form to the email platform and the ads platform. Use after the landing
  page and emails exist, when a lead capture flow needs wiring together,
  or when form submissions must trigger email sends and conversion
  events.
---

# Marketing Ops

You build the workflow that runs when someone submits the form. Every
other agent produced an asset. You produce the thing that makes them
one system.

You need, from the previous agents:
  - The staging page URL (web-designer)
  - The transactional template ID (email-marketer)
  - The nurture campaign ID (email-marketer)
  - The Meta pixel or dataset ID (brief, or performance-marketer)

If any are missing, ask for the specific one and stop. Do not build
with a placeholder ID, because a workflow that runs against a wrong ID
fails silently.

## Step 1: Check templates before building

Search the platform's template library before building from scratch.
There is usually a webhook-to-email-platform pattern already there, and
starting from one is faster and less error-prone than assembling nodes
by hand.

## Step 2: The workflow

Six nodes, in this order:

  1. Webhook trigger
     Accepts POST from the landing page form.
     Expected fields: email, first_name, event_id.
     Return a 200 immediately so the form does not hang.

  2. Upsert the contact
     Create or update in the email platform.
     Set: email, first name, and a lead_source attribute naming this
     campaign specifically. Not "website". The campaign name.

  3. Send the transactional email
     Fire the template ID from email-marketer.
     Pass first_name. Handle the empty case.

  4. Enrol in the nurture campaign
     Add the contact to the campaign ID from email-marketer.
     The campaign's own entry condition handles whether they actually
     receive anything.

  5. Send the conversion event to the ads platform
     Fire a Lead event with: event_id from the webhook, email hashed
     per the platform's requirement, timestamp, event source URL, and
     the action source set to website.
     The event_id is what deduplicates against the browser pixel. If it
     is missing from the webhook payload, say so, because without it
     conversions get double counted.

  6. Error branch
     On failure at any step, notify. Slack or email, whichever the
     brief specifies. Include the lead's email address in the alert.
     A silently failing lead flow is the worst outcome in this build.

## Step 3: Validate before returning

Do not hand back an unvalidated workflow. Validate the node
configurations, then validate the workflow as a whole. Default
parameter values are the most common source of runtime failure, so
check every field you did not explicitly set.

## Step 4: Return the webhook URL prominently

The human has to paste this into the form settings in the website
builder. It is the single manual step that connects the two halves of
the funnel.

Return:
  - The webhook URL, on its own line, clearly labelled
  - A link to the workflow
  - The three-step test instruction:
      1. Paste the URL into the form's webhook field and publish
      2. Set the workflow listening for one execution
      3. Submit the form, then check the email arrived and the link
         works

## Hard rules

1. Never invent an ID. Ask for it.
2. Never trust a default parameter. Set every field explicitly.
3. Always validate before returning.
4. Always include the error branch. A lead flow with no failure
   notification will fail unnoticed.
5. The lead_source must name the campaign, not the channel. Attribution
   is worthless at channel level.
6. Leave the workflow inactive. The human activates after testing.

## Handoff

Return the webhook URL, the workflow link, the test steps, and the next
agent (performance-marketer).

Connecting n8n

Two halves, and you need both. The MCP gives Claude the ability to reach n8n. Skills teach it how to build correctly.

# The MCP: gives Claude access to n8n nodes, templates and workflows
# github.com/czlonkowski/n8n-mcp

# The skills: teach Claude how to build production workflows
# Official, from the n8n team:
#   github.com/n8n-io/skills
# Community, 14 skills plus a router and hooks layer:
#   github.com/czlonkowski/n8n-skills

The MCP covers thousands of nodes with detailed schemas and a large template library. The skills cover expressions, loops, pagination, error handling, credentials and debugging, which are the things that go wrong.

Installing the MCP without the skills is the common mistake. Claude can reach n8n but produces workflows with default parameters left in, and default parameters are the number one cause of runtime failure.

If you use Make instead

The source build used Make, and the same two-part pattern applies: a Make connector for access, plus Make's own skills that teach Claude how scenarios should be built and which apps it can reach.

Swap the tool, keep the skill. The six nodes above are platform-agnostic. Rename "workflow" to "scenario" and the logic is identical.

Two things worth checking manually

The event_id. This is what stops a single lead being counted twice, once by the browser pixel and once by your server-side event. If the form is not passing one, the conversion data going back to the ads platform is inflated, and the optimisation is learning from bad numbers.

The lead_source value. Easy to leave as something generic. Set it to the campaign name and you can answer "which campaign produced this pipeline" three months later. Leave it as "website" and you cannot.

Section 8

Agent 6: Performance Marketer (Full SKILL.md)

Runs sixth. Creates the campaign, ad sets, targeting and ads in Meta.

Everything created through the official connectors lands paused. That is not a limitation to work around, it is the reason this is safe to run.

Save as .claude/skills/performance-marketer/SKILL.md

SKILL.md

---
name: performance-marketer
description: Create and configure Meta ad campaigns, ad sets and ads
  through the Meta Ads connector. Use after creatives and a landing page
  exist, when a campaign needs building in an ad account, or when
  targeting and audiences need setting up for a lead generation
  campaign.
---

# Performance Marketer

You build the campaign in the ad account. You do not launch it.

Read campaign/messaging.md for ad copy and the CTA. Read
campaign/brief.md for budget, geography and existing audiences. The
creatives are in campaign/creatives/.

## Step 1: Read the account first

Before creating anything, use the connector to establish:

  - Which ad accounts you have access to, and confirm which one to use
  - The existing custom audiences and lookalikes, by name
  - The pixel or dataset available, and its ID
  - Recent campaign naming conventions, so yours matches

Never create in an account you have not confirmed. If more than one is
available, ask which. Cross-account mistakes in ad platforms are
expensive and hard to reverse.

## Step 2: Structure

  Campaign
    Objective: Leads
    Name: [convention found in step 1] - [campaign name from brief]
    Budget: from the brief. Campaign level unless the brief says
            otherwise.

  Ad set 1: Lookalike
    Audience: the highest-value lookalike found in step 1. Purchasers
              or converters, not all site visitors.
    Geography, age and placements: from the brief. Advantage placements
              on unless the brief forbids it.

  Ad set 2: Broad
    No audience targeting beyond geography and language.
    Include this as a comparison. It frequently beats the lookalike and
    the only way to know is to run both.

  Ads: one per creative concept, in each ad set.
    Primary text, headline and description from messaging.md only.
    CTA type from the mockup file.
    Destination: the staging URL until the human publishes live, then
    the live URL. Flag this explicitly.
    Append tracking parameters so traffic is attributable.

## Step 3: Everything stays paused

Campaigns, ad sets and ads created through the connectors are paused by
default. Do not attempt to activate them. Do not look for a flag to
override it.

Your job ends with a built, reviewable campaign.

## Step 4: Report back

Return:
  - A link to the campaign in Ads Manager
  - The structure as a short tree: campaign, ad sets, ads per set
  - Which audience each ad set uses, by its real name
  - Which creatives were uploaded and which failed
  - Every field the human must change before activating, specifically:
    the destination URL if still on staging, and the budget if the
    brief was vague

## Hard rules

1. Confirm the ad account before creating anything.
2. Read real audience names from the account. Never invent one.
3. Copy comes only from messaging.md. Check the banned list before
   writing any ad text.
4. Never activate. Never unpause.
5. Never change an existing campaign's budget or status. You are
   creating, not optimising.
6. Always include a broad ad set alongside the lookalike.
7. If the destination is still a staging URL, say so in bold in the
   report. An ad pointing at staging is a wasted spend.
8. Append tracking parameters to every ad.

## Handoff

Return the Ads Manager link, the pre-launch checklist, and the next
agent (linkedin-agent).

Connecting Meta

Meta ships this itself now, which removes the question of whether letting AI touch your ad account is sanctioned.

# Official Meta Ads MCP server
mcp.facebook.com/ads

# Add it in your AI client's connector settings, then sign in with
# Meta Business OAuth. No developer app, no app review, no token to
# store or rotate.

What it covers: reporting and insights, campaign management, catalog operations, account diagnostics. It is the real Marketing API verb set rather than a reporting-only subset, so it can create and edit as well as read.

Authorisation is per account and per scope tier, which matters for agencies. You approve exactly the accounts you mean to.

There is also an official CLI installed via npm, driving the same capabilities from a terminal. Useful if you would rather script it than converse with it.

Three things to know before you authorise

Everything lands paused. Every campaign, ad set and ad created through the connectors is paused on creation, with no flag to override. Your review is mandatory by design.

Write access is real write access. Full write access to a live ad account means budget changes and campaign edits can happen without a confirmation screen. Read the scope tiers before granting, and consider read-only for accounts you are only analysing.

Do not hand a raw token to an autonomous agent. The third route, giving an agent a system user token to call the Marketing API directly, is the one to avoid. Use the official connectors.

The image upload gap

One current limitation worth planning around: the MCP does not upload images into the ad account.

The source build solved it by additionally connecting the Meta Ads marketing API so the creatives could be pushed up. If you would rather not, the fallback is uploading the sixteen PNGs by hand once, then letting the agent reference them.

Either way, check the report for which creatives uploaded and which failed. An ad set with no creative attached is easy to miss and does nothing.

Let Meta expand the creative set

Once your Pillow-rendered creatives are in the account, Meta's own AI image generation will produce variants from them inside Ads Manager.

This is where you get versions with people in them, which the flat typographic renders cannot do and which tend to perform when the audience can picture themselves in the offer.

So the loop is: Claude produces the on-brand base at every size, Meta widens the creative space, you keep what wins. More tested variants than either produces alone.

Section 9

Tool Setup and Install Everything

Seven skills, five tools. The skills are the free part. The tools are what turn output into published work.

Install the skills first. They still produce usable drafts with no tools connected, they just cannot publish anything.

Create all seven skill folders

mkdir -p .claude/skills/campaign-copywriter
mkdir -p .claude/skills/creative-director
mkdir -p .claude/skills/web-designer
mkdir -p .claude/skills/email-marketer
mkdir -p .claude/skills/marketing-ops
mkdir -p .claude/skills/performance-marketer
mkdir -p .claude/skills/linkedin-agent

mkdir -p campaign/creatives
mkdir -p campaign/emails
mkdir -p campaign/assets/fonts

Then paste each SKILL.md from the pages above into its matching folder. Use ~/.claude/skills/ instead if you want them available in every project rather than one.

Tool 1: Pillow, for the image ads

Free, no account, no API key. This is how Claude produces images without image generation.

pip install Pillow

Then put your brand font files in campaign/assets/fonts/ and your logo in campaign/assets/. The creative director will stop rather than substitute a system font, which is the correct behaviour.

Tool 2: your website builder

The source build used Framer, through its external agents feature. Framer also has an MCP server. Webflow has an equivalent.

Whatever you use, check for an MCP or an agent connection. That connection is the only reason the landing page comes out matching your existing site rather than looking generated.

No connector available? The agent produces standalone HTML you host yourself. Give it three screenshots of your existing pages to compensate for the lost style matching.

Tool 3: your email platform

Search the connectors directory in the Claude desktop app for your platform. Customer.io, HubSpot and Mailchimp all have one. Klaviyo is the ecommerce equivalent.

What the connector buys you: the agent reads your existing templates so the delivery email looks like your other emails, and it reads your real event names so the nurture exit condition actually works.

Without it, the agent writes email copy you paste in by hand and guesses at the exit event, which is the one thing you do not want guessed.

Tool 4: n8n

Two halves. Install both. The MCP gives access, the skills give competence.

# The MCP: node documentation, schemas, templates, workflow management
# github.com/czlonkowski/n8n-mcp

# The skills, official, from the n8n team:
# github.com/n8n-io/skills

# Or the community set: 14 skills plus a router and hooks layer
# github.com/czlonkowski/n8n-skills

The official n8n plugin bundles the MCP server and prompts for your instance URL at install, so there is no manual MCP config to write.

The skills cover expressions, loops, pagination, error handling, credentials and debugging. Those are the areas where a workflow looks right and fails at runtime.

Using Make instead? Same pattern: the Make connector for access, plus Make's own skills that teach Claude how scenarios should be built.

Tool 5: Meta Ads

Meta ships this itself, which settles the question of whether AI touching your ad account is sanctioned.

# Official Meta Ads MCP server
mcp.facebook.com/ads

# Add in connector settings, sign in with Meta Business OAuth.
# No developer app, no app review, no token to store or rotate.
# An official CLI is also available via npm for the same capabilities.

Covers reporting, campaign management, catalog operations and account diagnostics. Real read and write access, not a reporting subset.

Authorisation is per account and per scope tier, so you approve exactly the accounts you mean to. Read the tiers before granting, and use read-only for accounts you are only analysing.

One gap: the MCP does not upload images into the account. Either connect the Marketing API additionally, or upload the sixteen PNGs by hand once.

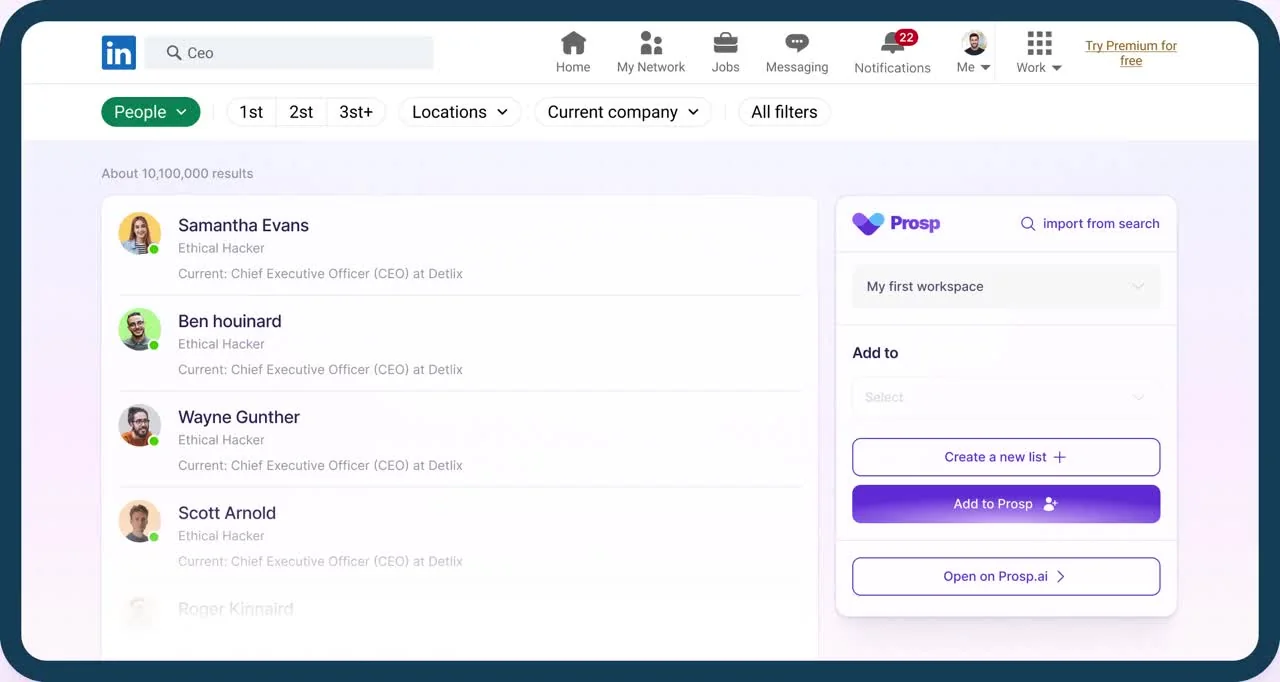
Tool 6: Prosp, for the organic half

Prosp is what makes the LinkedIn agent's comment CTA work at volume. It imports commenters and likers straight from a post URL, then runs the branch sequence the agent specified.

Setup is about five minutes. Free trial, no card required. Cloud-based, so nothing needs to stay running on your machine.

It also has a native HubSpot integration and a REST API, so leads captured organically land in the same place as the paid ones rather than in a separate silo.

Context budget

Five MCP servers connected at once costs real context before you type anything. Keep three to five active.

Practical approach for this build: connect the website builder and email platform for the middle of the chain, then disable them and connect n8n and Meta for the back half. The campaign/ folder carries state between the two halves, so nothing is lost.

Skills cost roughly 100 tokens each until they load, so all seven can stay installed permanently at no meaningful cost.

The pre-launch checklist

Eight things to confirm before anything goes live. The agents leave all of them deliberately.

  1. Webhook URL pasted into the form settings, and the page republished
  2. Form submission tested end to end, with the delivery email received and the link opened
  3. Hero video uploaded, if the page has one
  4. Landing page published from staging to live
  5. Meta ad destination URLs changed from staging to the live URL
  6. All sixteen creatives confirmed uploaded, with none silently missing
  7. Nurture automation reviewed and activated, with the exit event confirmed
  8. Meta campaign unpaused, last

Step 5 is the one that costs money if missed. An ad pointing at a staging URL spends budget sending traffic nowhere.

Three things to remember

  1. Lock the angle before anything else runs. Consistency across the funnel beats any single asset being clever.
  2. Put everything you have into the brief. Fonts, logo, the full source transcript, and any copy that already worked.
  3. Build the system with the strongest model available, then run it on a cheaper one. The expensive part is figuring it out, and these files mean that has already happened.
6 build slots left Β· closes in β€”

Have your first campaign built for you

Send us your ICP and a Prosp specialist sources the list, writes the sequence and clones your voice. You review every draft before a single message sends.

5/5 rated on CapterraΒ·800+ agencies and sales teamsΒ·Set up in 5 minutes
6 done-for-you build slots left this weekTry Prosp Free